Friday, September 29, 2017

Cozy Little Hues to Use!

Hello all and welcome!  For my Power Poppy Parade, I have a happy little color combo that you can use to inspire creativity in your own stamping spaces! If you missed me last Tuesday over on the Power Poppy Hues to Use,  I am sharing a little instant replay for you!


HOW TO PLAY: Playing is super duper simple, just use this color combo above of sassy succulents in one of your creations and then link it up HERE on the Power Poppy Blog! Remember, each and every entry is seen by our eyes which means, if you play along, you might just be chosen to be a future guest hostesses on the Power Poppy Blog for an upcoming Hues to Use post! 


ON TO MY CREATION....


I have to say, with fall here, I had a hankering to use Power Poppy's Get Wool Soon digital stamp set. Can you believe that I.... a knitter.... had never used this little number before? Oh my! What's wrong with me?!?!?!! The good news is that I tend to knit quite a bit in the fall for others, for gifts, so this little digi is going to be used quite a bit!

Do you want to see what I just took off the needles this week? Check it out! This is a slouchy hat done up in a chevron pattern for my son's girlfriend, who loves purple tones. I used the Loops & Threads yarn from Michaels in the color Baroque. I like the way it turned out and the hat is super soft!


And, if you enjoy knitting and want to give this pattern a try, HERE is a link to the free pattern from Plymouth Yarns.

And then, days later, I finished this little number for my son!  You can find that pattern HERE! 

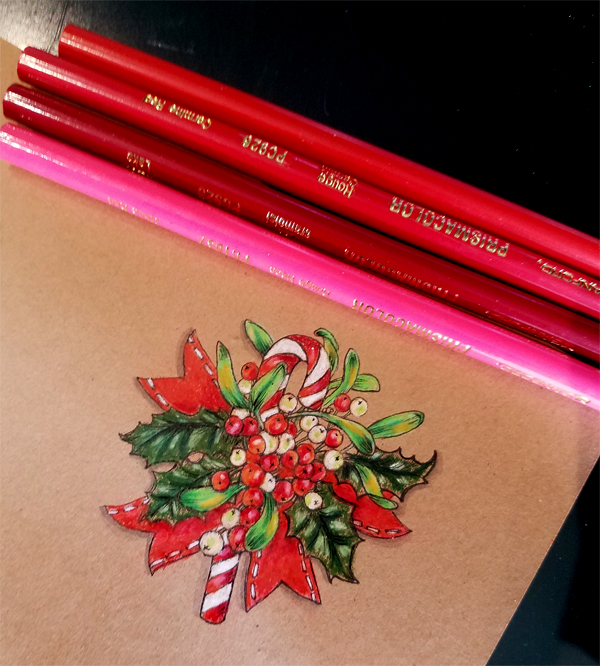
Ok, I digress! For my creation, I printed the Get Wool Soon digital stamp set off and then grabbed my Copic Markers and went to town, using these colors below. I will point out that the E40 and E0000 were used to shade around the bottom of my image. The rest were used to color up the image itself. I did add a little glitter pen to the silver knitting needles as well as the steam above the coffee cup to add just a bit of sparkle!


And, here's a close-up for you!


And, here's a peek on the inside! I did color up portions of the sentiment and accented with a few white dots. See?


And that, my friends, is it! So dig into these hues and let's see what you've got! Once you're done, don't forget to link up your creation below. Get those fingers inky and join us in the fun!

Before I go, I have a fun announcement!


You only have two more days to cash in on this good vibe! Simply use 30DAYCOLORING at checkout in the Power Poppy Shop and BAM, you have more money to spend on feel-good stamps! Yes, call me your official 'enabler!' I'll gladly take the title. If you have your eye on one of our additions to our Instant Garden, don't let this little bunch of savings pass you by!

And now... drum roll please... THE BLOOMIES!!!!


Pay these sweet ladies and fabulous designers a visit and see what beauty they whipped up in their craft spaces ... just for YOU!

Julie Koerber >>> you are here! 

Thanks so much for stopping by and spending a little of your day with me! I hope you have a wonderful weekend!
~Julie

Friday, September 22, 2017

All About Love....

What do you say to a woman who has been your friend through ups and downs through thick and thin, through old creative pursuits and new exciting endeavors? What do you say when she is about to step into a new and beautiful chapter of her well-lived life?

Well, let me take a stab at it because this woman happens to be Ms. Marcella Hawley. Tomrrow at 5:30 PM CST, she and the love of her life will pledge their love and with the celebration of vows and a kiss to seal the deal, she'll be Mrs. Douglas Scronce!

Just check out these two love birds, will you??? Those little photos of fern and woodsy greenery is just a teeny weeny sneaky peek of the look Marce is going for on her big day. So unique. So whimsical. So Marcy!


Marce, you are an absolutely amazing woman. You constantly amaze me with -- for lack of better words -- your beautiful human nature. You teach me on a daily basis what it means to truly care for others, to give them your best. I told you before that for me to give you advice on your new married life would be silly. You and Doug already have all the "ingredients" for a beautiful recipe for marriage. The way you honor eachother is something that is a testament to love. It's beautiful and I know the two of you are going to just traipse through life from one adventure to the next. I so wish I was there just to capture a bit of the magic that will soon unfold. Cherish your special day sweetie and know you are loved by so many -- including me!


Because Marcy's decor inspiration board included some succulents for her centerpieces, I decided to make a wedding card to honor this theme using Power Poppy's Succulent Singles! I created the front thanks to just a little handiwork in PhotoShop and then, stamped and masked all around the names & date. It was hard, as you can see, to center it all up and I didn't really do the best job but, overall, I think it was a fun effect! I pretty much used every shade of green I own in the YG shades --- YG00, YG03, YG06, YG17 along with BG70, BG72, G21, G11, G20, G24, V01, V04, V06, before highlighting with BG000 and BG0000. I also added, which you can't see in any of the photos, some Wink of Stella clear pen. This really sparkles in real life when it hits the natural light, which is super fun and ramps up the wedding feel!

Here's a close up, you can see that I added a little dimension to portions of this spray of succulents!


From there, I matted this on pearl green Bazzil card stock - again, you can't really see the pearl sheen, but it's there! Then, I added some pale pink satin ribbon and a layer of white sheer with an irridescent edge for another pop of razzle dazzle. I kept the razzle dazzle on the down low for this because Marce is more of a simply elegant lady! ;-)

I'm not the only Bloomie posting today! There is a whole slew of us and it's all a part of this...


Check out our Bloom Brigade and Instant Gardener Team creations and heartfelt words as they help celebrate this happy and beautiful couple! 


And, if YOU want to send Marcella away wishing her a lifetime of happiness, please HOP ON OVER HERE leave your sentiments in the comment section! I happen to know Marcy reads each and every comment and this would just be icing on her wedding cake knowing you care enough to share the very best with her! 

💗💗💗 All the best to you Marcella & Doug! 💗💗💗

~Julie


Friday, September 15, 2017

Krafty Christmas Coloring!

Hello all and happy Friday to you all! I have a fun little card to share that's actually showing off not one, but two Power Poppy Challenges going on as we speak! On top of it all, I actually have a Christmas card to sock away for when I need it later this year. I know! Say it isn't so!

So, let's get right into all this fun, shall we? Earlier this week, Kate Sanders ushered in this little color challenge for Hues to Use showing off a bit of late summer flair! You can check out the deets on this fun-filled party HERE! 


Earlier this month, Christine urged us all to partake in....


You can read all about this little challenge HERE! 

And so, my sweet stamping friends, I decided to tackle both with my creation for today!


I knew I wanted to use one of Power Poppy's brand new additions to the Instant Garden for this one! Who doesn't just love coloring up new images, so I printed off this baby -- Merriest Berries -- which offers up three different images with a few beautifully scripted sentiments to match! I printed it off on kraft card stock and then.... grabbed these!


 I honestly don't think I've touched my Prismacolor Pencils in an eternity. So, this was good to try my hand at a different medium for a change. When I started coloring, you can see my little mistletoe branches had quite the shade of mint going on there....


 The beauty of colored pencils, as many of you know, is the fact that layering color can be done with ease. This shade still peeks through but you can tone it down by reaching for greens that are more grassy or even olive as I did! See?


You can see that I also took some cool shades of Copic and added a bit of a shading underneath my image. I should say that I did this before I started my coloring. I've been told that because of the waxy nature of Prismacolor pencils, you do not want to touch your Copic marker nibs to this because it will likely get gummed up thanks (or no thanks) to the wax.

And this, my friends, is my finished card! I added some antiquey decorative papers, a half doily and some gilded twine and... ta da! Done!


Here's a close up for you! You can see that do add back in some definition, I did use a Copic Fine Liner over top. I know I just told you that I didn't want to touch my Copic Markers to this waxy surface but for the liner, I did. I risked it! ;-) I think the result was worth it, just to bring back some of that fine line....


And that's it from me today! Be sure to hop on over to see....


These ladies have some fine works of art on display and they'd love it if you hopped on over to pay them a visit!


Thanks for spending a bit of your day with me! I have some coloring projects on my desk... as we speak... so I know I'll be back soon to share with you all! :-)

Have a great weekend!

~Julie


Sunday, September 3, 2017

My Small But Mighty Craft Closet

Hello folks! First off, I have to say that I spent ALL DAY yesterday going through tubs of stamps and I have added A TON of stuff to my sale page...


I am getting rid of a ton of Spellbinders dies and have added a bunch of red rubber cling stamps -- all of which are in new or like new condition for dirt cheap! THESE THINGS ARE PRICED TO SELL FOLKS!  I just need to make room and decided if I didn't have time to use these beauties, they should go to someone who can put them to good use!

You might ask, you need to make room? You've been downsizing for a while now, haven't you?

The truth is, when we moved into our new house last March, we decided not to finish the basement right away, which is the future home of my craft space. Yep, sad but true. Sometimes, there are just more important things that pull on your finances -- like braces for the kiddo or school tuition or that softball camp, sending the boy child to college or.... you get my gist! So, I thought I'd share my little crafting  room closet with you all! It is literally a 5-foot by 5-foot walk in closet that I claimed. I told my husband in no uncertain terms that this closet was mine. I married a pack rat and if I didn't, he'd decide that those bank statements from 20 years ago (yes, this is the truth) needed a shelf or two. Love that man but... golly! Heavy sigh.

So, here's a peek. I wanted to show that, with some planning, you can cram a whole mess of stuff in a small space!

This is obviously a view from the door. You can see we have a few shelves added for plastic bins which house all kinds of buttons, embellishments, ink pads, glues, etc. -- basically anything that's small and would love to sit in a drawer! The two black bins (from the dollar store) at the top have glue runners and finished cards. Two white bins toward the right have pre-cut cards and envelopes in every color of the rainbow, ready to rock and roll as soon as a card front is done. Black and white patterned bins house die packages and embossing folders. Those bins from Thirty-One Gifts were the perfect size for these things! Ribbons are in jars on the bottom of the bookcase as are my Spellbinders machine and a plastic covered tub full of acrylic blocks.


On the wall behind the door, I added small hooks that I picked up at Lowe's over the years ($6 to $8 apiece) and as you can see, they house all my dies. Did you see I am selling a ton of these HERE?


On the third shelf, I have four of these little bins I picked up at Target for clear stamps. All of my stamps are placed in THESE Avery Elle sleeves to keep those little polymer stamps in their place! I did add a piece of white card stock to serve as a backer so I could better "see" my stamp sets! I have them in alphabetical order so I can also easily find them! 


Here's a close up of those bins I mentioned earlier! I love that they have a handle so I can grab and go if need be.


Along the other wall, I have cubbies that house paper and have a few extra drawers for wood stamps. the material cubbies have ribbons and scraps, some larger punches and large 12" paper pads. 


And, here's how I store my colored and decorative card stock -- in file folders arranged according to color group. 


And then this guy was a lifesaver for ink pad and reinker storage! 


I got this from a store that went out of business for free and it houses my Copic reinkers nicely! Soon, I'll outgrow it but for now, it works! 


And there you have it my friends, my humble little craft closet. You might ask. If this is a closet, where do you craft. Well, this is the closet attached to the home office. So, I pull things from the closet and craft here....


You might say, wait a minute, you have a room! Well, I have to work here too. As a writer, my desk is USUALLY covered with papers, article clippings, notebooks full of my deadline schedule, etc.

So, there you have it peeps -- my little corner of the creative world! Maybe some of my tips might help you store more per square foot! ;-)

~Julie


Friday, September 1, 2017

A little racy.....


Hello peeps! Just in case you missed the unveiling over on the Power Poppy blog earlier this week, I thought I'd share it right here on my little 'ole place on the web! I have to say, I love hosting Hues to Use and finding a bit of color inspiration in the most unusual places! 

Here's a peek at this week's color palette, which was captured on a fun little marketing piece Marcella designed that truly embodies the love she has not only for "her man," but "her man's hobbies!" Doug, if you didn't know it, loves to fix up vintage motorcycles and "kicks it vintage" regularly with his lady at a monthly get together with fellow enthusiasts. So, when I spotted this card done by Marce herself promoting an upcoming event, I said, "YAAAAASSSS!" This must be our muse for Hues to Use!


With the color combo above as my guide, here's what I came up with my sweet stamping friends!


To create this little moto-inspired wonder, I started by printing off the Power Poppy digital stamp set Well Hello Dahlia. I then colored it all up using Copic markers and chose these shades for the flowers: YR68, YR04, YR07, Y02, R14 for the large flower; Y15, Y35, and Y38 for the yellow flower off to the right; BG01, BG04 for the right vase; BG000 and BG10 for the left vase; R01, RV00, and R32 for the left flower; G20, G21, and YG67 for the greenery and B00, B91, B93 and B95 for the center vase. The bottoms of the vases were shaded with BV0000 and BV01. The highlight around my image was done with G0000.

Here's a little close-up!


After that, it was all about matting it up! I used a few different sizes of pennant flags and then, added the little Well Hello Dahlia sentiment thanks to a 1-3/8" circle punch matted on a shape cut by a 1-1/2" circle punch. Add a little twine-strung button and... ta da!

And that, my friends, is it! So soak up these shades and get crack-a-lackin' with your craftin'! Once you're done, don't forget to link up your creation on THIS POSTSharing your talents could have you taking center stage on the Power Poppy Blog as the guest hostess with the mostess! Now, wouldn't that be fun!

Speaking of fun, it's time to head on over and pay these lovely ladies a visit!


Christine is the hostess this month for this fun-filled challenge too! 


So click HERE for the fun and krafty details about this month's Power & Spark! Then, don't forget to join us and play along! 

Until next time, my sweet stamping friends!
~Julie